
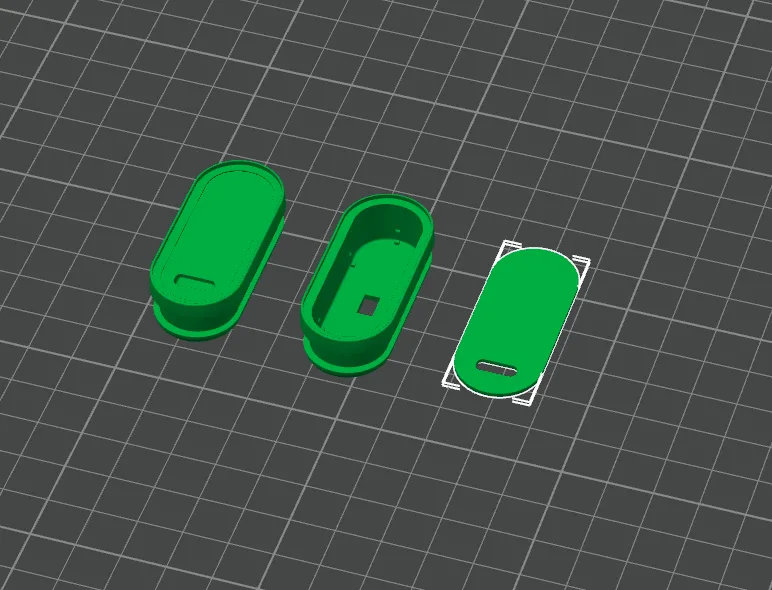
3D Case Download and Assembly Guide
The provided 3D case is designed to protect VitalTrack - PPG&Motion while keeping it fully functional. The base design supports a variety of environments. It is Newert's recommended design, but you may modify it freely to suit your needs.
· Download the 3D file: Download the 3D case file for the VitalTrack - PPG&Motion board from our website.
· 3D printing: Print the case on a 3D printer using the downloaded file.
· Recommended print settings (print quality may vary when using third-party 3D printers)
▸ 3D printing software: Bambu Studio v1.9.3
▸ Layer height: 0.1 mm
▸ First-layer height: 0.2 mm
▸ Infill density: 50%
▸ Supports: On (automatic)
- Support type: Normal (automatic)
- Threshold angle: 30°
· Install the Case
▸ Place the VitalTrack board in the printed 3D case.
▸ Align and insert the board into the case.
▸ Fit the top cover onto the case in the correct orientation.
▸ No screws or clips are required for assembly.
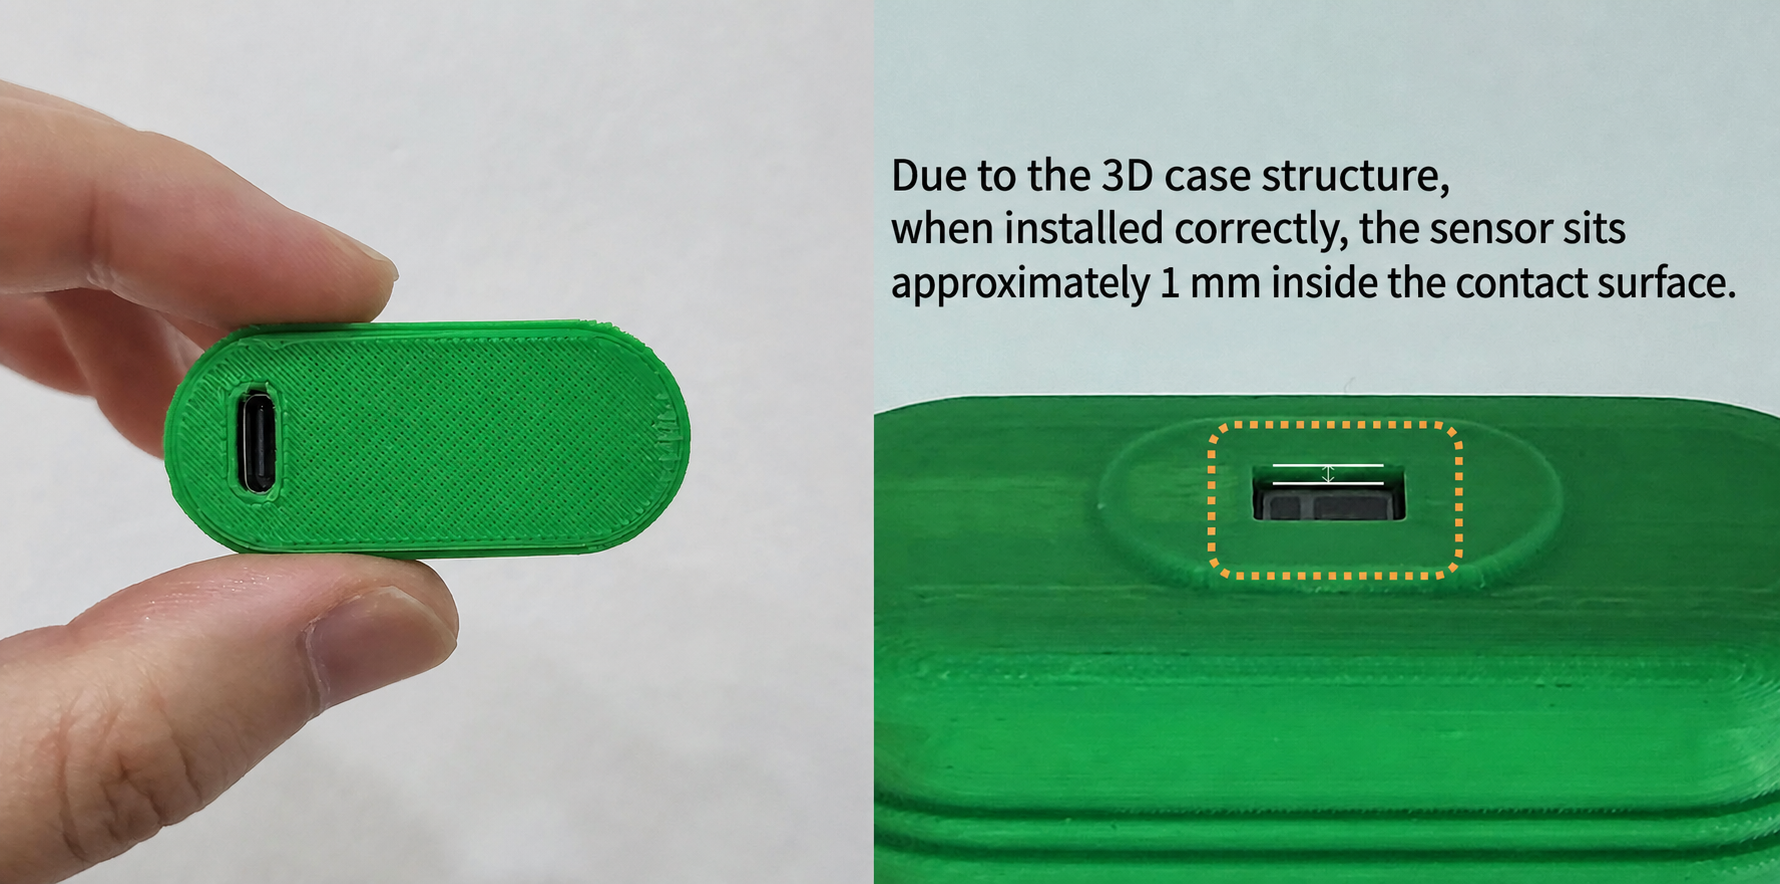
▸ When installed correctly, the sensor sits within 1 mm of the inside surface of the contact face due to the case geometry.
💡 Additional Information
Modifications: The provided 3D case is designed to protect the VitalTrack device while keeping it functional. It is Newert's recommended design, but you may modify it freely to suit your needs.
Printers and materials: A variety of 3D printers and materials can be used, and print quality may vary by material. Common materials such as PLA and ABS are recommended.
Customization tips: You can add ventilation holes, cable-management holders, and other features as needed. Modify the file in 3D modeling software before printing.
Operating environment: The case can be used indoors or outdoors. Consider an additional coating to improve durability and water resistance.
Use the information above to protect and operate the VitalTrack board in optimal condition. Contact our support team if you have additional questions.
Precautions
When installing the case on the sensor board, align the case's reset-button opening with the reset button on the sensor board. The case is designed to be difficult to separate after the board is installed. Confirm the alignment once more before assembly.
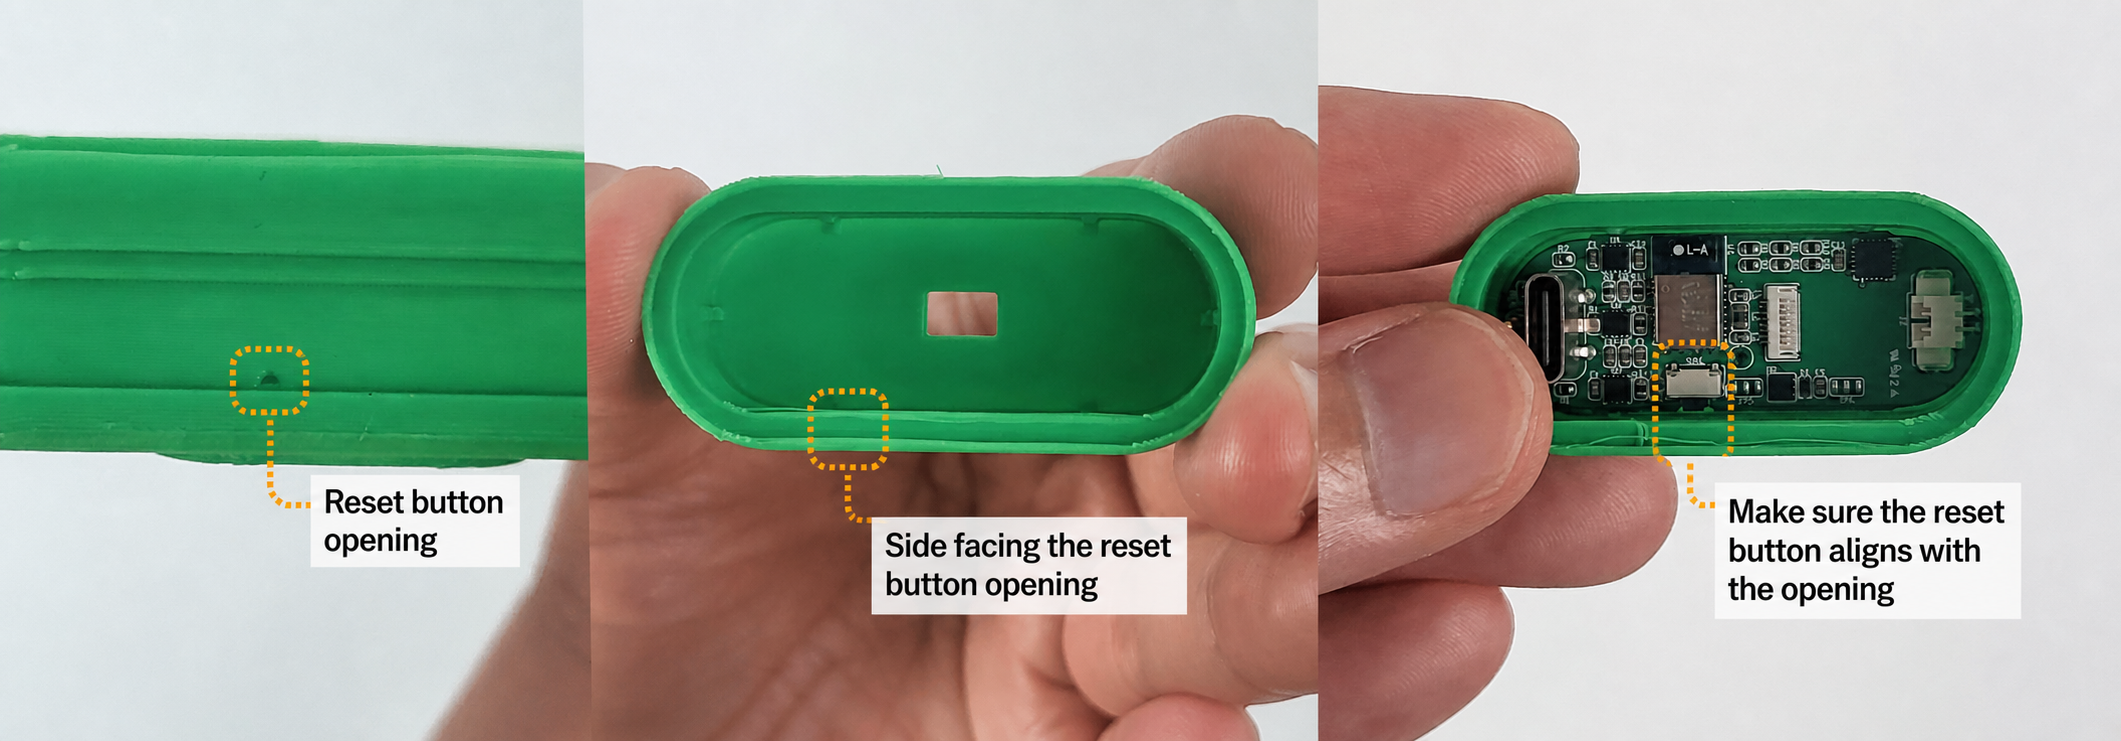
<Case reset opening and sensor-board reset button>
For more information about the sensor board and case, refer to the product manual(page link).